2025 Half Dome Lottery Guide | Hike the Epic Cables Route

A bit confused by the Half Dome lottery and permit system? You’re not alone! As a travel writer who’d written about Half Dome many times before hiking it myself, I know a LOT about the ins and outs of the route. This guide outlines everything you need to know!
Yosemite is one of the world’s most revered national parks, and Half Dome is one of its most iconic landmarks—not to mention one of its most bucket list-worthy and challenging hikes.
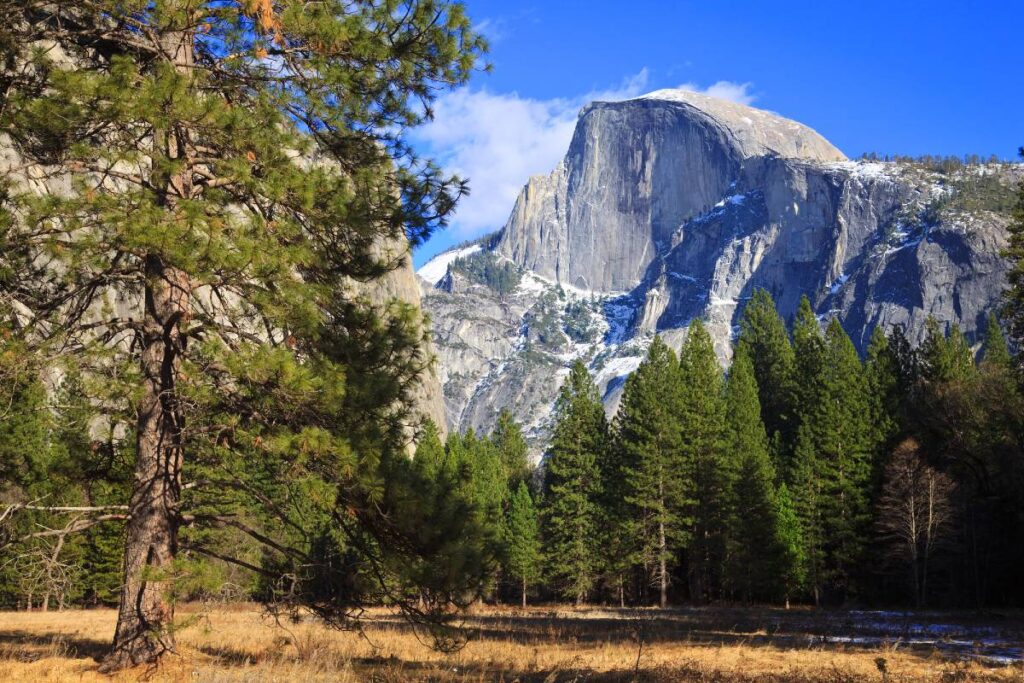
Half Dome itself is quite literally breathtaking at first sight. Towering 4,737 feet above Yosemite Valley and 8,844 feet above sea level, its nearly-perfectly-vertical face is one of the steepest cliffs in North America.
A longtime fascination of alpinists and explorers, and before that, a central part of Native American tradition, it’s no surprise that Half Dome continues to captivate, beckoning people to its summit.
That summit, however, is not easily reached, even for the most experienced hikers and climbers. For starters, for half the year, you need a hard-to-get Half Dome hike permit—won only via the Half Dome lottery, much like The Wave in Arizona.
Once you get your permit, you’ll face an unrelenting 16-ish mile round-trip hike with nearly 5,500 feet of elevation gain. It’s arguably one of the most memorable hikes in any national park, and certainly among the most rewarding!
And we haven’t even discussed the infamous Half Dome Cables yet…
While neither thing—winning a Half Dome permit or conquering the formidable Cables Section—is by any means impossible, it’s also not exactly a cake walk. It is, however, a very literal walk in the park…(sorry, had to!).
With some patience, flexibility, persistence, and advance planning, winning the Half Dome lottery is completely do-able (we got ours on the first try!).
In this guide, we outline ALL the details of getting a Half Dome hike permit, the different route options, what to expect on the trail, and other important info such as the best time of year for the hike, where to stay, and more.
This post contains affiliate links. I may receive a small commission — at no cost to you — if you click or make a purchase through any of them. For more information, read my disclosure statement. I appreciate you!
Psst…do you have an annual national parks pass yet? This handy pass gets you into all 63 national parks, plus over 2,000 other federal recreation sites. Think national monuments (Mount Rushmore), recreation areas (Lake Powell), and others! Read all about it HERE!
Jump ahead to:
- The Half Dome Lottery at a Glance
- How to Enter the Half Dome Lottery
- Yosemite Wilderness Permits
- How Much Does a Half Dome Permit Cost?
- Tips to Increase Your Odds of Winning a Half Dome Hike Permit
- Know Before You Go | Important Info About Hiking Half Dome
- Half Dome Hike: What to Expect on the Route
- Camping Along the Half Dome Hike
- Alternatives to Hiking Half Dome
- Transportation Logistics for Hiking Half Dome
- What to Pack for Hiking Half Dome
- Where to Stay Near Half Dome
The Half Dome Lottery at a Glance
- Half Dome lottery basics: Permits are notoriously difficult to land, but with several reservation options, it’s realistic with some planning and flexibility
- When are permits required? All hikers are required to have a permit for the Half Dome Cables section when the cables are up, typically from late May to early October
- When to apply for a Half Dome hike permit: Pre-season permit lottery (March 1-31st) or a walk-up application 48 hours before the intended hike
- Hiker vs. backpacker permit: Half Dome hike applications for backpacking are issued through a separate permit system
- Half Dome permit cost: $10 application fee + $10 if you’re issued a permit
- Detailed permit information
It’s important to note from the very beginning that a Half Dome permit is not required for the entire hike; it applies only to the 400-foot Cables section at the very end.
Hikers can do about 90% of the trail (which includes the Mist Trail) without a permit.
Permits are also ONLY required when the cables are up.
This is typically from the Friday before Memorial Day through the Tuesday following Columbus Day, although weather and other factors may change the exact dates slightly. Outside of that timeframe, there is no Half Dome lottery.
During the months the cables are up, a park ranger physically checks permits at the base of what’s known as Sub Dome, the “false summit” just before the cables.
Do not proceed to Sub Dome and up the cables without a valid Half Dome permit — not only can it result in a hefty fine, but it’s also a danger to yourself and others.

Insider tip: if you don’t win a permit in the Half Dome lottery but still want to tackle the hike, ask the ranger if there are any permit cancellations that day.
On that off chance, you may be able to purchase one on the spot. Obviously, this isn’t the ideal strategy to bank on for getting a Half Dome permit, but it could be a good Hail Mary.
The permit system can undoubtedly be frustrating, but without it, the cables section of the trail would be incredibly dangerous. It’s already sketchy with several people, so it’s hard to imagine what it would be like if it was unregulated!
There are three ways to get a Half Dome hike permit: the pre-season Half Dome lottery; the daily lottery, which you can enter two days before your hike; and a wilderness permit, for backpackers.
How to Enter the Half Dome Lottery
Only 225 permits are issued for the Half Dome Cables Route each day of the open season. Fortunately, however, there are several ways to get one through the Half Dome lottery.
Pre-season Half Dome Lottery
The pre-season Half Dome lottery is by far the best way to secure permits, especially for popular times like summer weekends and holidays. It’s also the only option that allows you to choose up to six back-up dates and covers a range of time, rather than one specific date.
If you win a permit in the pre-season Half Dome lottery, you also have a higher likelihood of booking accommodation in Yosemite Valley, which seems to sell out even quicker than Half Dome permits!
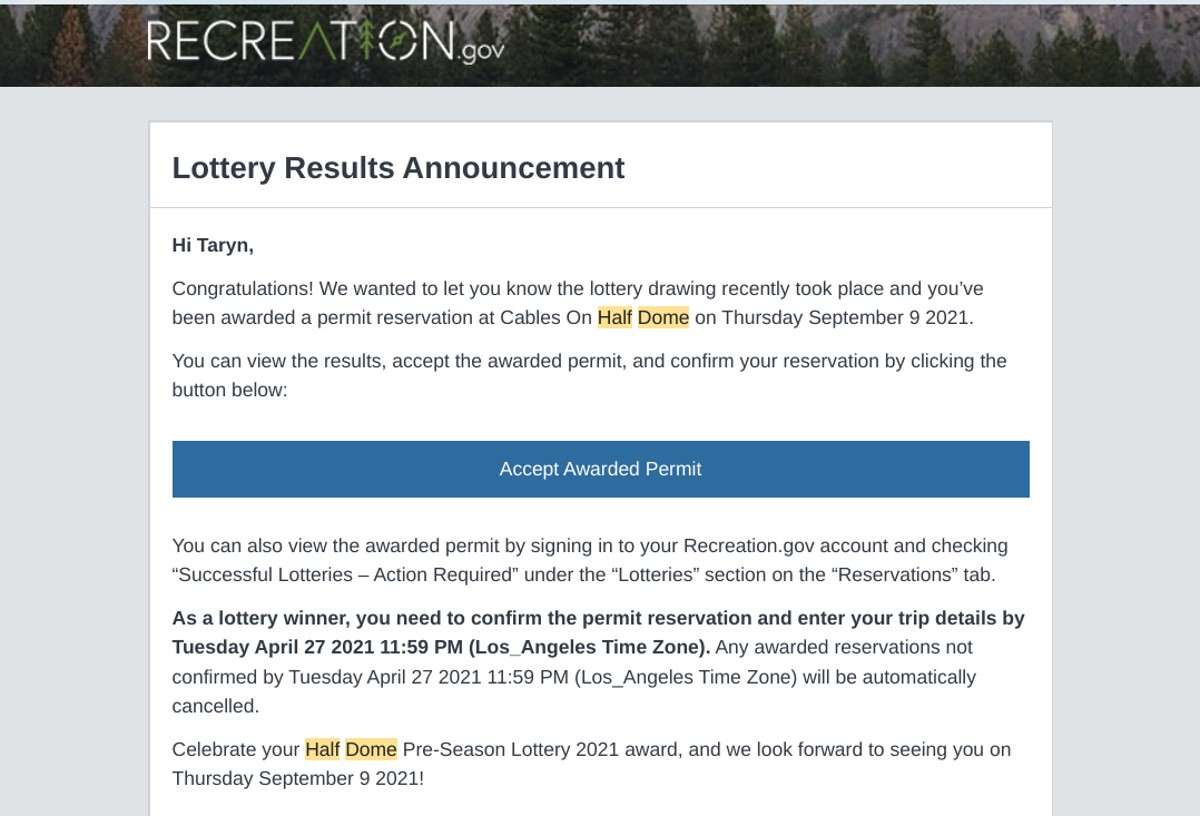
The pre-season lottery runs from March 1-31 every year on Recreation.gov, and winners are notified in mid-April. The day you apply has absolutely no bearing on your chances, so simply enter any time during the month.
To be very clear, someone who enters on March 1 has the exact same odds as someone who enters on March 16 or March 31.
Up to six people can be named on one Half Dome permit application, and you’re required to name a group leader and an alternate. The alternate must have their own Recreation.gov account and accept their role within the timeframe specified in the email.
This alternate system allows the rest of the group to hike even if something comes up for the group leader and he or she is no longer able to go. Note that either the group leader or alternate MUST be present to proceed past the ranger to Sub Dome, and permits are non-transferable!
We actually ran into something tricky with this; our group separated because we were hiking at different paces. We had the foresight to take a picture of the permit, which stayed with the group leader, and that allowed the others to proceed without waiting for everyone else.
When you apply for the Half Dome lottery, you’ll enter dates based on priority. Obviously, your odds are significantly better with more dates, so enter as many as your schedule allows!
In 2023, 22% of Half Dome lottery entrants received a permit, so the odds aren’t terrible. Remember, NPS issues 225 permits per day, and your odds are far better on weekdays.
‘Second Chance’ Daily Half Dome Lottery
If you don’t get a Half Dome hike permit in the pre-season lottery or simply decide to hike Half Dome on a whim as you travel around California, there’s also a daily lottery.
Hopeful hikers can apply for the “daily” Half Dome permit two days before their intended hike. The online portal accepts entries from midnight to 4:00 pm so, for example, if you want to hike on June 14, you would apply for the permit on June 12.
Winners are announced later the same evening on the website or via phone the following morning, so you’ll have about 36 hours’ notice.
Important: Unlike the pre-season Half Dome lottery, the daily permit system only grants individual permits. That means everyone in your group must apply separately, and only those who secure a Half Dome hike permit can go up to the summit.
NPS doesn’t disclose the specific number of daily lottery permits awarded, but says it’s “based on the estimated rate of under-use and cancellation of permits.” Many people speculate it’s about 50 permits per day.
The average success rate for Half Dome daily lottery permits in 2022 was about 30% on weekdays and 18% on weekends. We recommend going into it expecting to NOT get a Half Dome permit (and being genuinely surprised when you do!)
Yosemite Wilderness Permits
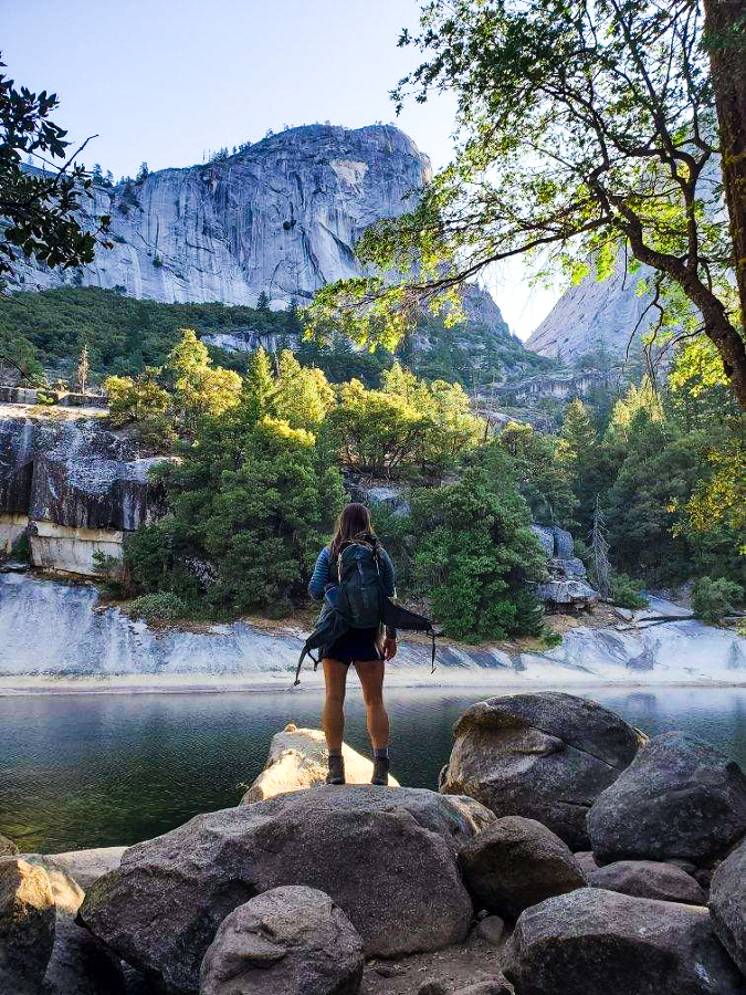
Quick note: we hiked Half Dome as a massive day hike and, while it can definitely be done (we made it!), all four of us agreed we’d camp overnight in the park if we ever do it again. It breaks up the hike and allows you to tackle the worst sections at the end after you’ve gotten some rest.
This section explains how to do exactly that!
While backpackers do require separate camping and Half Dome Cables permits, they don’t apply for them through the traditional Half Dome lottery.
Instead, you’ll apply for a Yosemite wilderness permit (i.e.; a backcountry camping permit) anywhere from 24 weeks up to 7 days in advance.
This type of Half Dome permit is sold as a $10 add-on with a wilderness permit. Essentially, you apply for a backcountry campsite and get the Half Dome hike permit for an additional $10.
Just like with the pre-season and daily Half Dome lottery, you’ll need to specify your start date and group leader information, plus your ascent and descent trailheads, and campsite. You can specify up to eight options on your permit application, including a variety of dates and trailheads.
Note that securing a Yosemite wilderness permit does not guarantee you will also get a Half Dome hike permit. You may have to try multiple date/campsite combinations in multiple application periods to get both permits.

Wilderness permits are available ONLY for the following trailheads:
- Cathedral Lakes
- Glacier Point to Little Yosemite Valley
- Happy Isles to Little Yosemite Valley
- Happy Isles past LYV (Donohue pass eligible)
- Mono Meadow
- Rafferty Creek to Vogelsang
- Sunrise Lakes
If you don’t utilize one of the specified trails, you’ll need to enter the traditional Half Dome lottery and apply for hiking permits separately.
Pre-season Yosemite Wilderness Permit Reservations
60% of wilderness permits are available via the pre-season lottery reservation system, and the remaining 40% are released 7 days in advance on a first-come, first-served basis online.
Note: if you previously got one of these first-come, first-served permits, also known as walk-up permits, this process moved to 100% online in 2022.
Importantly, backpackers need a wilderness permit year-round, but reservations are only required from May through October (exactly like Half Dome permits).
During pre-season reservations, you can apply for Yosemite wilderness permits exactly 24 weeks in advance, on a rolling basis.
You can apply once during each weekly application period, which runs from exactly midnight PST on Sunday to 11:59 pm Saturday. Successful applicants are notified the following Monday.
Any available reservations are released on a first-come, first-served basis 12 days after the weekly application period (Friday, 22 weeks out) and remain available until 7 days in advance.
Week-ahead Yosemite Wilderness Permit Reservations
One week in advance, the remaining 40% of Yosemite wilderness permits are released via the first-come, first-served “week-ahead reservations” system.
You can apply for one of these permits up to three days in advance of your hike date, but note that reservations typically go in literal minutes. Log into your Recreation.gov account and ready a few minutes ahead of time!
The trip leader or named alternate must pick up wilderness permits in person at one of the park’s wilderness centers the day before their hike, or from 8-11:00 am the day of.
Day-of Yosemite Wilderness Permit Reservations
Finally, any unreserved wilderness permits are available at the wilderness centers in person only on the day of. Please note these permits are exceedingly rare.

How Much Does a Half Dome Permit Cost?
Entering the Half Dome lottery costs $10 per application, and this fee is non-refundable. If you get a permit, you’ll pay an additional $10 per hiker.
Yosemite wilderness permits are $10 each, plus an additional $10 per hiker for Half Dome permits.
Tips to Increase Your Odds of Winning a Half Dome Hike Permit
- Apply for weekdays! Tuesdays and Wednesdays, in particular, receive half the volume of applicants as weekends.
- Consider backpacking the trail. Not only does it break up the hike, but the more competitive traditional Half Dome lottery is selected from a different applicant pool.
- Head to the trail during the shoulder season. Late May, early June, and September and October dates receive fewer hikers than the rest of the summer.
- If hiking with a group of 5 or 6 people, designate separate group leaders and alternates and put in multiple Half Dome lottery applications.

Know Before You Go | Important Info About Hiking Half Dome
Won a permit in the Half Dome lottery? YAY! Now it’s time to learn about the hike itself.
How difficult is the Half Dome hike?
There’s no sugarcoating it: summiting Half Dome is challenging. The trail climbs nearly 5,000 feet straight up in just seven miles, and coming down such a steep incline is also tricky. In fact, it’s so steep that most of us preferred the uphill!
Having said that, with some training and (keyword ‘and’) previous hiking experience, conquering the entire Half Dome hike—cables and all—is totally doable.
Start training as soon as you have a date, and think outside the trail. Loads of exercises help you prepare for a hike this big. Cardio will drastically boost your endurance, while glute exercises can actually improve mobility. Did you know that weak glutes can cause knee pain?
Again, though, we can’t emphasize this enough…be prepared for a massive, long day!
Best time of year to hike Half Dome
The best — and safest — time to summit Half Dome for average hikers is when the cables are up, which is late May through early October.
Technically, you can reach the summit when the cables are down, but it’s only recommended for VERY experienced mountaineers with climbing experience and who are familiar with the ascent.
It’s also highly recommended that anyone attempting the summit when the cables are down (and really, it’s a good idea even when they’re up) have proper climbing gear including a harness and carabiners.
Deaths on Half Dome are actually (surprisingly) relatively low at 20 in about 100 years, but the vast majority of them occurred when the cables were down.
It’s worth noting that NPS does not report specific numbers of injuries, stating only “injuries are not uncommon for those acting irresponsibly.”
How long does it take to hike Half Dome?
The Half Dome hike takes anywhere from 9-14 hours. This depends largely on your level of fitness and what type of hiker you are, as well as how often you take breaks and if there are lines for the cables.
Two of us—myself included—hiked painstakingly slowly (we’re avid hikers, but in our defense, it was abnormally HOT in Yosemite the day we hiked in mid-September, nearly 100°, and we got VERY little sleep the night before) and still finished in just over 12 hours.
The other two in our group hiked at a much faster pace and beat us to Half Dome by about an hour.
Regardless of how quickly you think you can do it, start as close to sunrise as possible. This beast of a hike is an all-day affair.
Is there camping on Half Dome?
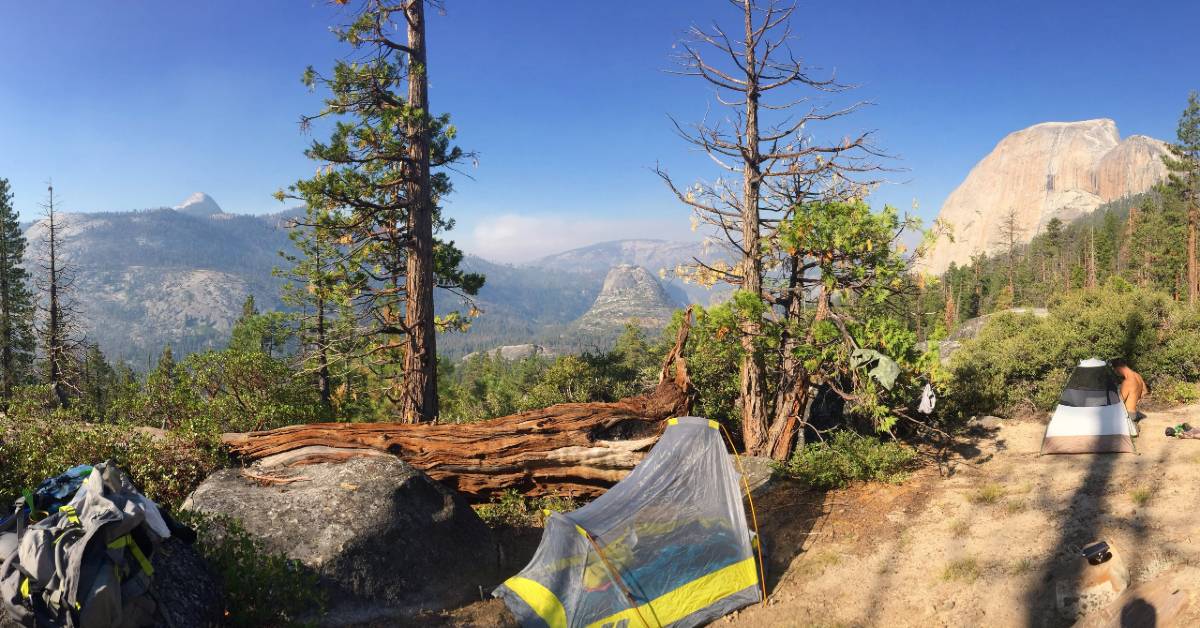
There is no camping on Half Dome itself, but you can camp at Little Yosemite Valley, 3.5 miles from the summit. Camping is a fantastic way to break up this long trail, plus Little Yosemite Valley is an amazing campground!
Note that wilderness permits for trailheads leading to Little Yosemite Valley (Happy Isles to Little Yosemite Valley or Glacier Point to Little Yosemite Valley) are notoriously extremely difficult to get, selling out in seconds from when they become available.

Half Dome Hike: What to Expect on the Route
There are two routes to reach Half Dome: the Mist Trail and the John Muir Trail (JMT).
Note that AllTrails shows about a dozen options. The ‘main’ one (and definitely the best one) is THIS ROUTE, which follows the JMT. However, you can clearly make out the Mist Trail loop/cutoff, so it’s easy to see how to create your own lollipop-shaped loop.
Speaking of AllTrails..cell service in Yosemite is notoriously bad. The park is also huge and has nearly 300 trails, many of them interconnected, so it’s really easy to get turned around.
That’s exactly why I always download trail maps ahead of time on AllTrails. The free version of AllTrails is awesome, but on long, brutal hikes like Half Dome, the offline trail maps alone are well worth the $2.99 a month.
AllTrails+ even lets you try it for a week before committing, so there’s really no reason not to. At the very least, sign up for the free account and level up your hiking game.
Both route depart from Yosemite Valley and have similar elevation gain, but they’re quite different in scenery, terrain, and difficulty. The JMT is also 1.5 miles longer.
After doing several hours of research, we decided to take the Mist Trail up to Half Dome and the JMT back down.
This gives you a fantastic variety of scenery and allows you to enjoy most of it with head-on views, plus puts some of the most difficult terrain at the beginning of the hike, when you have plenty of energy.
Although the John Muir Trail adds a bit of distance, the trade-off is a substantially less-steep hike down.
The very beginning and end of your hike will be the same regardless of which route you choose. The trailhead starts at the Happy Isles shuttle stop, just under one mile from Curry Village and a half-mile from the parking lot.
Quick note: The Yosemite shuttle doesn’t start running until 7:00 am, and you should be well on your way to Half Dome by then. You can drive to the parking lot and walk the half-mile to the trailhead or, if you’re staying at Curry Village, just walk.
Accounting for both directions, this added about 1.75 miles to our total hike, but it’s an easy, flat stretch.
One mile in, the trail splits at the Vernal Fall Footbridge. This is the only “real” bathroom on the Half Dome hike, and an excellent place to fill up water.
Mist Trail
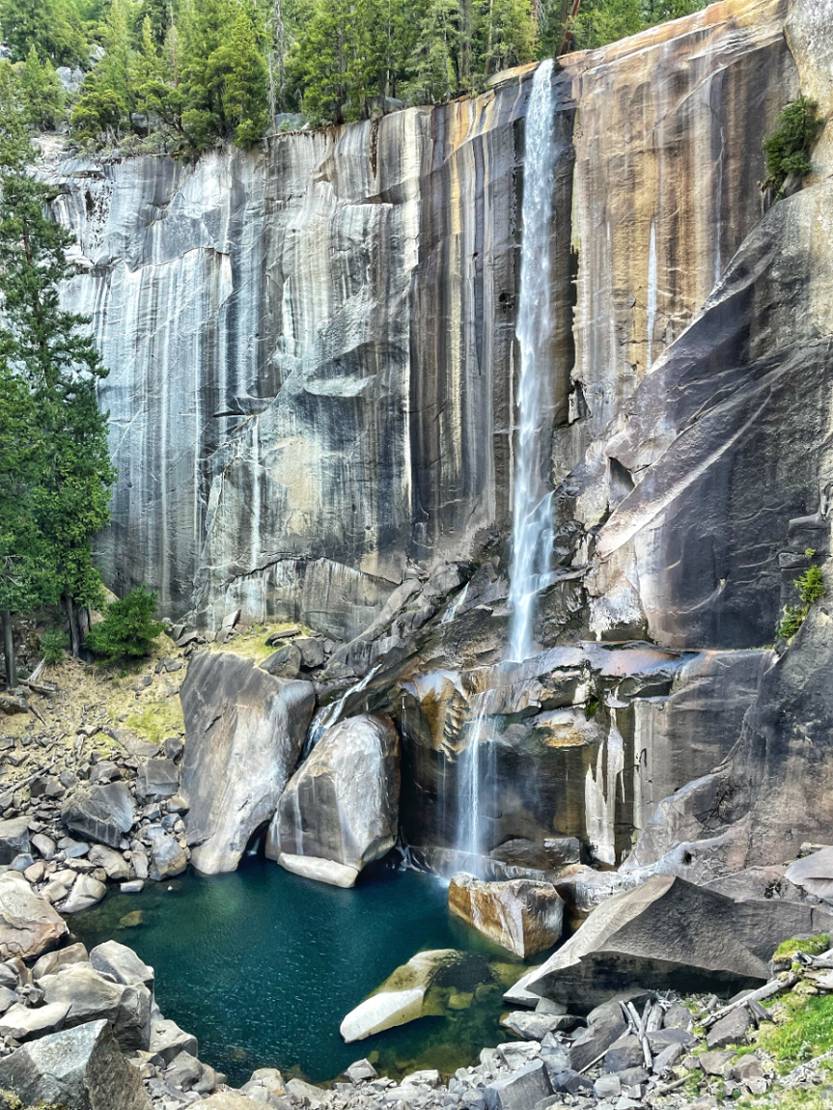
The Mist Trail takes you directly alongside and up to the top of spectacular Vernal Falls, a highlight of the Half Dome hike. When we say up to the top of the falls, we mean it very literally — you’ll climb a whopping 600 stone steps!
Although it sounds counterintuitive, trust us when we say you’d rather climb UP these steps than DOWN. These steps are often wet and slippery (it’s no mystery how the Mist Trail got its name), and some of them are enormous, so at times you’re practically climbing.

Believe it or not, more deaths have occurred on the Mist Trail, in this particular stretch near Vernal Falls, than on Half Dome itself. Take it slow and be extremely careful!
The next milestone on the trail is Nevada Falls, two miles from Vernal Falls. This leg of the trail is mostly through shady forest and up lots of rock steps. There’s a pit toilet here, as well as signs for a Nevada Falls overlook 0.2 miles away.
If you’re hiking the JMT down, you’ll go right past this viewpoint, so save yourself the detour on the way up.

For a short distance after Nevada Falls, the trail is blissfully flat(ish) as it meanders alongside the Merced River. This is also where you’ll find Little Yosemite Campground. If you need a bathroom, there are pit toilets in the campground, along with a ranger station.
Soon, you’re slogging upward again, this time in a beautiful, dense forest of Sequoia trees. This section isn’t technical, but it is an unrelenting climb upwards.

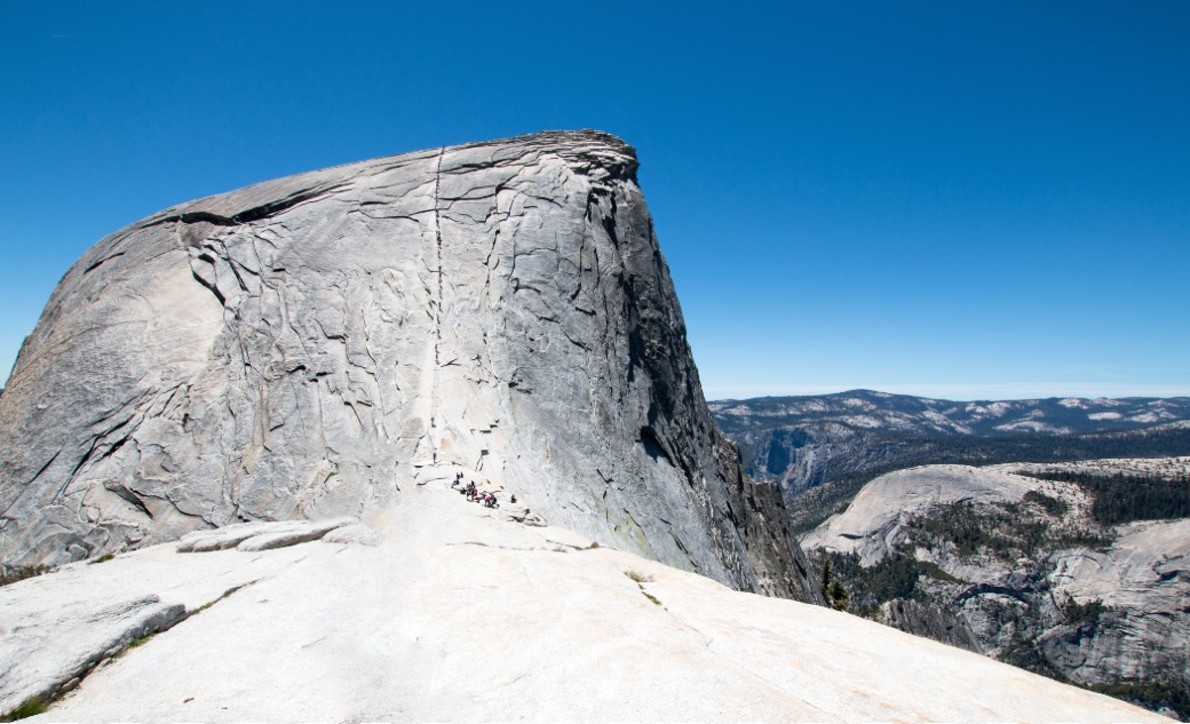
When you catch glimpses of Half Dome, use it as an excuse to rest for a moment and look carefully — you may be able to see teeny-tiny hikers inching up the cables.

In about 2.5 miles (6.5 total from the trailhead), you’ll arrive at the base of Sub Dome, the last obstacle before ascending the cables.
Just before reaching it, there are some absolutely spectacular views of the Sierras, so give yourself a few minutes for photo ops (and to mentally prepare yourself for what’s next).

Remember: a ranger will check permits at the base of Sub Dome, so if you weren’t successful in the Half Dome lottery and do not have a permit, your hike ends here.
This makeshift “ranger station” is also an excellent place to have a drink or snack, re-configure your pack, put away your trekking poles, and get your gloves and climbing gear on, if you’re using either.
You can’t have anything hanging off of your pack, so the ranger will instruct you about what to put away. There’s a large bear-proof storage box here for you to store anything you leave behind, and we saw several people leave their big backpacking packs.

Sub Dome
People have wildly different opinions about Sub Dome. Some think it’s far more difficult than the cables section, while others think it’s a piece of cake.
Personally, we found it challenging, but nothing in comparison to the absolute slog of a climb we’d just done in 90-something degrees for about seven miles.
This 0.5-mile section of the Half Dome hike is extremely exposed, which is what makes it both fun and difficult.
There are several enormous granite “steps” to navigate, and I use quotation marks because it’s difficult to determine if they’re actual steps or if you’re, in fact, rock climbing. A few times, we did a sort of weird backwards crab walk move to keep our footing.

There are sections on Sub Dome with no discernible trail whatsoever, and it’s easy to veer off-course. Take your time here and pay attention. Thankfully, this leg is short.

You’ll know when you’re at the top of Sub Dome when you come face-to-face with the infamous, mind-blowingly steep cables. This is a popular spot to collect yourself and take a rest (or have a beer!)


Cables Section
You made it to Half Dome, an accomplishment in itself. Now, all that’s left to do is scale the 400-foot, near-vertical cables to the summit.
If there’s a visible storm or lightning anywhere on the horizon, DO NOT continue. The top of Half Dome is NOT where you want to be during a storm.

Exhilarating for some and terrifying for others, this is what the Half Dome lottery is all about. As you watch hikers leapfrog one another to go up and down the cables, imagine what it looked like pre-2010, before the permit system was implemented!
Whether you have the cables all to yourself or they’re packed with fellow hikers, take it slow. Use the “three points of contact system,” meaning that you’re always touching the cables and/or granite with three of your four limbs. Both feet and one hand, both hands and one foot, etc.
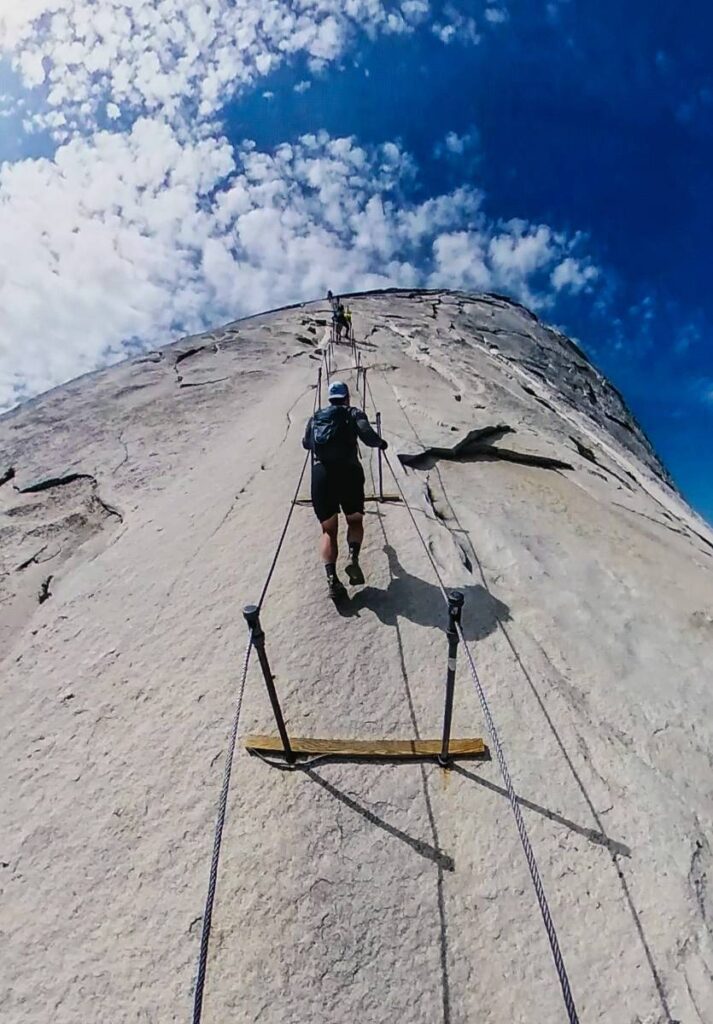
The granite is incredibly slippery in places, the result of thousands of feet more or less polishing it over time. You’ll also quickly realize that some of the wooden boards aren’t very secure and some of the poles have a bit of give.
That three points of contact rule helps ensure that you’re stable even on the slippery sections or where you don’t have great footing.
Keep in mind that other hikers will be coming down the cables as you’re heading up. The general rule is that those ascending yield to those descending. When that happens, find a safe place where you can stand off to the side while holding onto the cables.
If you’re afraid of heights, avoid looking down or out to the sides. After about 20 or so minutes (depending on “traffic” on the cables), you’ll be at the summit! Celebrate and take a well-deserved deep breath — and a million photos. There’s nothing else quite like it!


When you’re ready to head back down, retrace your steps down the cables and Sub Dome. Many hikers find it easier to come down the cables backwards, so you’re facing the rock.
John Muir Trail (JMT)
Once you descend Sub Dome, follow your original route through Little Yosemite Valley toward Nevada Fall. If it’s hot out, consider taking a dip in the Merced River! There’s a lovely calm stretch shortly before the trail junction.
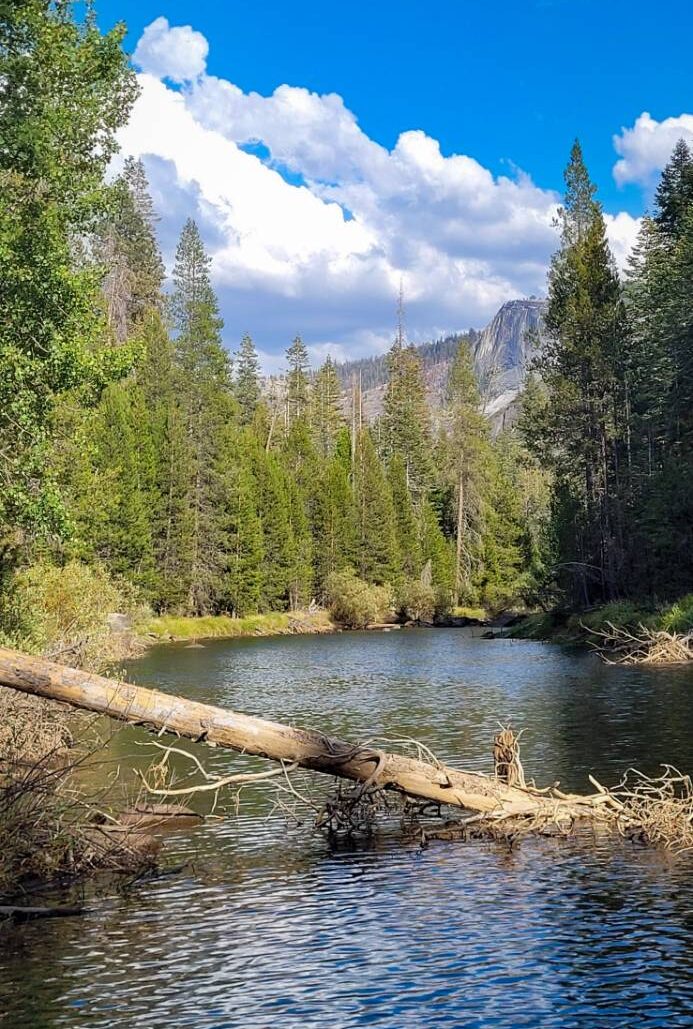
At the trail junction with the pit toilets, take a left toward the John Muir Trail. Right takes you back down the Mist Trail, which is about 1.5 miles shorter, but significantly steeper — and likely wet and slippery.
At this point you’ve hiked about 14 miles, the majority of it nearly vertical, so it doesn’t seem wise to attempt navigating steep, slippery granite steps.

You’ll quickly cross the bridge at Nevada Fall, which is a gorgeous area with insane views of Liberty Cap and the backside of Half Dome.
When we hiked in September, the river and waterfall were just trickles. The upside, though, is that we enjoyed a unique granite beach-like area because of the low river. We refilled our water bladders here using a gravity purification system.
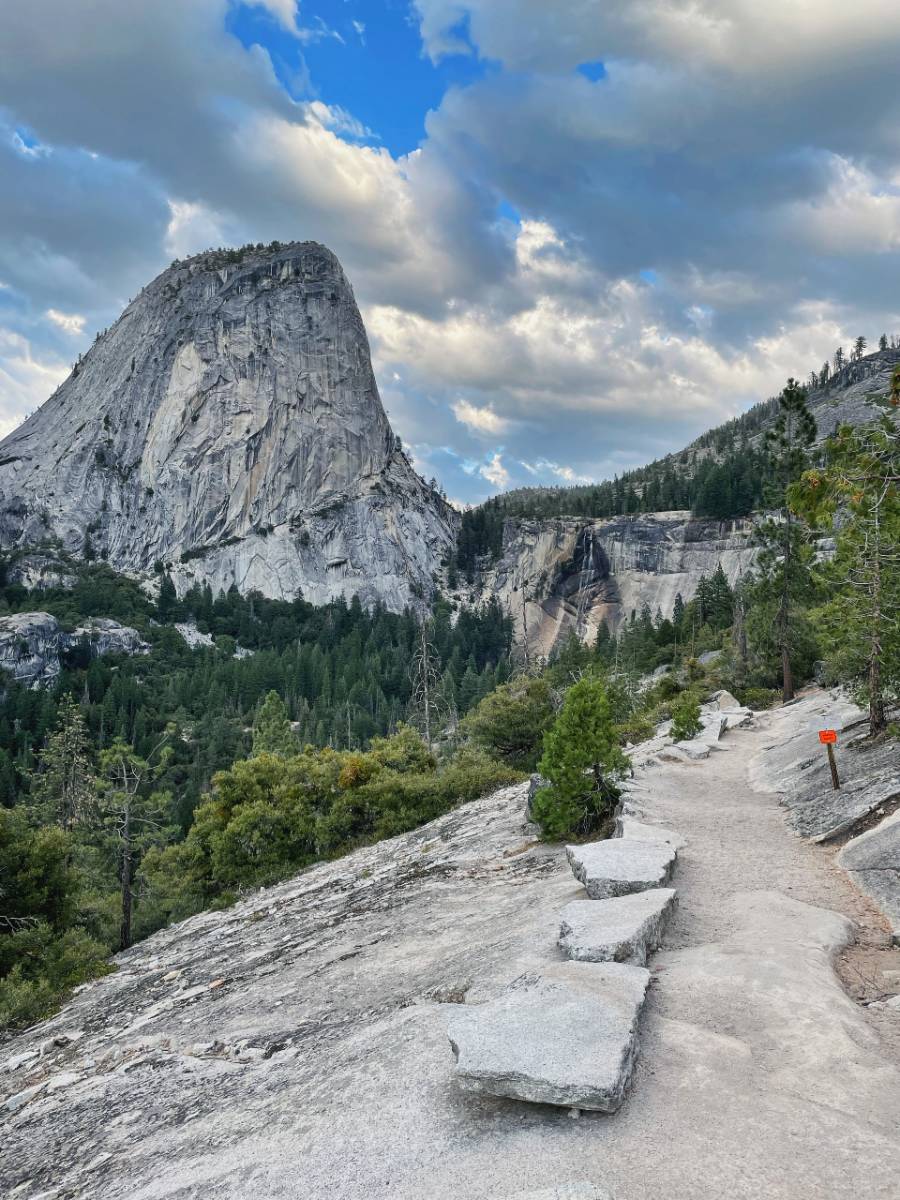
On the other side of the bridge, the trail heads into the forest for a short while, then pops you out onto a stretch with a picturesque rock wall. This was our favorite part of the hike out, with spectacular views in every direction.
We even saw a large black bear trying to get honey out of a beehive deep inside a log!

After the first mile, the trail starts to steeply descend with a never-ending series of long switchbacks. You’d think downhill would be a welcome change, but it’s so steep that it’s actually brutal. If you brought trekking poles (you should bring trekking poles!), you’ll want them on this stretch.

Four miles and several dozen switchbacks later, the JMT meets up with the trail at the junction for the Mist Trail route you took earlier in the day. The Vernal Fall Footbridge, restrooms, and water station are just ahead — which means you’re nearly finished!
From here, there’s just one final mile back to the trailhead, and about 1.75 miles to Curry Village. We set a goal early in the day of recounting our day over pizza and beers at Curry Village, which closes at 8:00 pm in the summer.
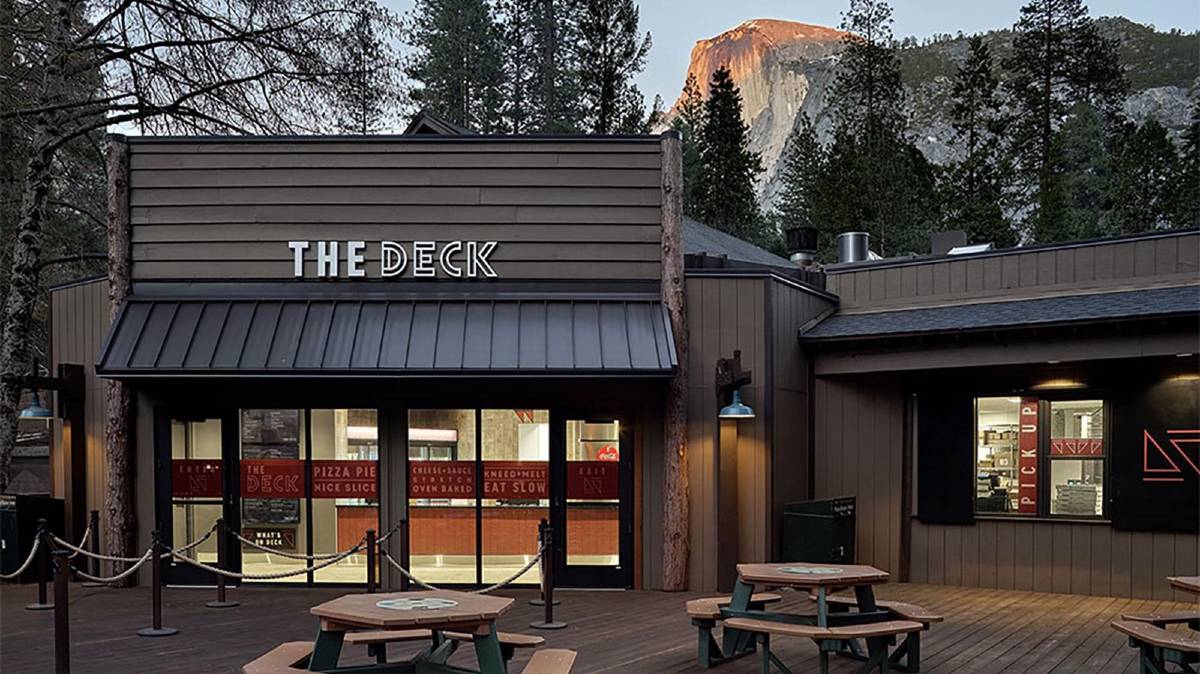
Knowing we were very literally racing against time to ensure we had a proper meal, we practically ran that final stretch! We made it with about 30 minutes to spare and I swear this is not in the least bit an exaggeration — all four of us nearly fell asleep on the deck of the lodge waiting for our pizza!
It’s safe to say that was one of the best meals of our collective lives.
Camping Along the Half Dome Hike
The main campsite en route to Half Dome (and the closest) is Little Yosemite Valley campground, located about 4.5 miles into the trail and 3.5 miles from the Half Dome summit.
Unsurprisingly, wilderness permits for Little Yosemite Valley are some of the most difficult to get (even more difficult than getting a permit in the Half Dome lottery!). Be sure to apply as far in advance as possible, pick weekdays if you can, and have plenty of patience.

An excellent ‘glamping‘ option, Curry Village is a large canvas tent village that also has cabins and motel rooms. We stayed in a canvas tent the night before our Half Dome hike and while it’s very basic, it does the job and puts you extremely close to the trailhead.
There’s also additional tent camping at the nearby Lower Pines Campground. While it’s definitely not secluded camping, the area lets you start your hike early. Just like the other accommodations in Yosemite, make reservations far in advance.
- Little Yosemite Valley Campground: Located about halfway into the Half Dome hike; Wilderness Permit required
- Curry Village: The largest in-park lodging option with glamping canvas tents, cabins, and motel rooms, plus showers and onsite restaurants. Advance reservations required.
- Lower Pines Campground: Tent camping close to the trailhead; reservable through Recreation.gov
Alternatives to Hiking Half Dome
Didn’t win a Cables Route permit in the Half Dome lottery? Not to worry! Keep in mind that you only need a Half Dome hike permit for the Cables section between May and October.
You can hike all the way up to where the cables start any time of year without a permit and if you’re a very experienced hiker, you can also hike Half Dome all the way to the summit even when the cables aren’t up.
And if you’re looking for a totally different alternative, here are some other epic, challenging hikes in Yosemite with similar views (that don’t require a permit or have cables!).
- Clouds Rest Trail – 13.5 miles out-and-back; difficult
- North Dome – 9.2 miles out-and-back; difficult
- Pohono Trail – 17-mile loop; difficult

Transportation Logistics for Hiking Half Dome
Massive Yosemite National Park is fairly remote, so getting there takes some advance planning.
How to Get to Yosemite National Park
The closest major airport is Fresno Yosemite (FAT), about 65 miles from the park’s South Entrance in Fish Camp. While the Fresno airport is small, it’s serviced by most domestic carriers.
Most people pick up a rental car, groceries, and supplies in Fresno before making the 1.5-hour trip. Alternatively, in the summer months, there’s an inexpensive shuttle bus that runs from Fresno to Yosemite Village, making a visit without a car totally doable!
Another popular option is to fly into San Francisco, Oakland, or Sacramento and road-trip to Yosemite. Be sure to fuel up before hitting the road, like at one of the cafes in Sacramento!
This drive takes about four hours to either Yosemite’s Big Oak Flat or Arch Rock entrances on the west side of the park.
Being significantly larger airports, this option offers more flight choices and allows for some time in the city and other nearby attractions, like Napa Valley.
Unfortunately, there are no public transportation routes from the Bay Area directly to Yosemite. The best method without a car is to take a Greyhound bus to Merced and then catch the YARTS bus.
- Distance from Fresno to Yosemite: 65 miles; 1.5 hours
- Distance from San Francisco: 190 miles; just under 4 hours
Getting to the Half Dome Trailhead
Parking fills up quickly inside the park. During peak summer and fall days, it often reaches capacity by mid-morning.
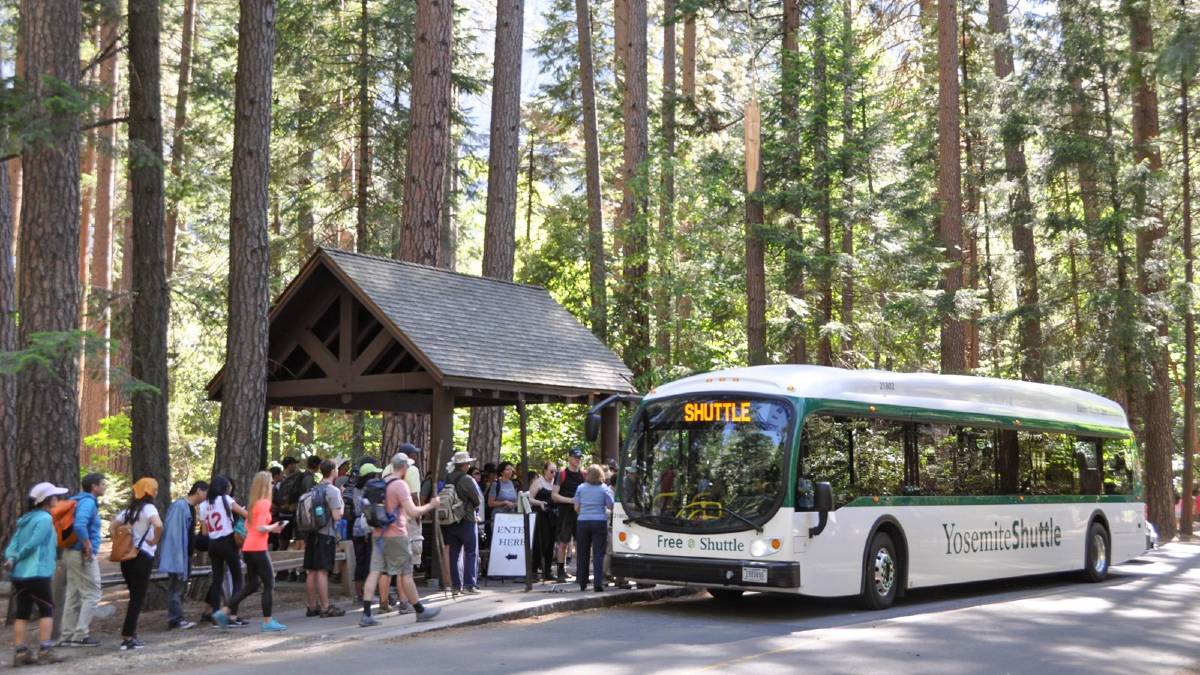
To ease congestion, *IF* you’re starting your Half Dome hike later in the morning, utilize the free Yosemite Valley Shuttle System.
It services the park’s hot spots and many parking lots, running every 12-22 minutes. The shuttle stops at Happy Isles, the start of the Half Dome trail via the Mist Trail.
Keep in mind, however, that the shuttle doesn’t start running until 7:00 am. If you’re starting earlier (which you should be), try to park at the large Curry Village lot and walk the extra .75 miles.
WANT MORE YOSEMITE & CALIFORNIA CONTENT? YOU’LL LOVE THESE!
What to Pack for Hiking Half Dome
- Your Half Dome permit, downloaded to your phone
- STURDY hiking boots. Strong ankle support is highly recommended for hiking Half Dome, even if you typically hike in low-top shoes or Chacos. We hiked Half Dome in La Sportiva Ultra Raptor II Mid GTX’s and Salomon X Ultra 4 Mid’s…and definitely recommend
- Lots of water. Fill your hydration bladder and bring extra, whether it’s another bladder or a few bottles. Remember, you need more than enough, plus extra in case of an emergency!
- We also recommend a personal water filter or other water purification method so you can carry less water. We love the Platypus QuickDraw system! A gravity filter or Grayl water bottle also works beautifully on the Half Dome hike.
- Sun protection. Sunscreen, sunglasses, and a wide brim hat
- Wool socks. Plus a backup pair in case your feet get wet or develop blisters!
- Headlamp. You’ll be hiking in the dark, either pre-dawn or at night…or both.
- Grippy gloves for the cables section. We prefer fingerless for hiking, as they’re a bit more breathable, but these also come in a full-finger style
- Trekking poles. Mostly for the hike down!
- Comfortable, lightweight layers
- Packable rain jacket
- Energy gels or chews. For quick boosts on the trail between snacks
- A map of the Half Dome trail route or offline directions
- Backpacking gear, if you’re making a multi-day trip of it and camping along the way
Where to Stay Near Half Dome
Not necessarily into camping, but want to stay nearby for convenient access to the Half Dome hike? Massive Yosemite has an (almost overwhelming!) abundance of options, both in and outside the park.
Quick note: Yosemite National Park accommodations are a hot commodity, particularly in the summer and fall. Make reservations as far as possible in advance and go into it knowing there are no budget options.
It is absolutely worth spending more for the convenience, though, as this area is enormous. If you don’t stay in or right outside the park, you could easily be facing a 2-3 hour drive just to the entrance!

Where to stay inside Yosemite
For truly unforgettable accommodation, you can’t beat staying in Yosemite Valley. Located within walking distance of the Half Dome trailhead, the valley has jaw-dropping views and many of the park’s best services.
Curry Village is one of the most convenient and affordable options with canvas glamping tents, cabins, and motel rooms. Plus, glamping in this epic setting is definitely one of the most unique things to do in California! However, there are also some other options in the valley.
- Yosemite Valley Lodge: Large hotel in the heart of Yosemite Valley with free parking and within walking distance of several major attractions and dining options
- The Ahwahnee: Picture-perfect, upscale lodge with old-school charm
Where to stay outside Yosemite
Since accommodation near Yosemite is fairly limited and the area as a whole is remote, prices are steeper than a lot of other places. However, it’s well worth the extra expense to be within easy driving distance of the park.
The last thing you want to do is drive two hours to your hotel after your Half Dome hike!
Here are some excellent properties close to Yosemite.
Fish Camp
- Tenaya Lodge: An eco-minded resort with pools and a spa
- Narrow Gauge Inn: Old-school style inn with mountain views
- Beautiful Yosemite Log Cabin: Classic mountain cabin 2 miles from Yosemite entrance
- Southgate Getaway: Large cabin nestled in the woods
Oakhurst
- Sierra Sky Ranch: Historic ranch stay with upscale furnishings
- Hounds Tooth Inn: Charming cottages with private garden
- Gingerbread Tiny House: Picture-perfect A-frame chalet ideal for couples
- Dog-friendly Home in Downtown Oakhurst: Renovated, airy home with a movie theater
Bass Lake
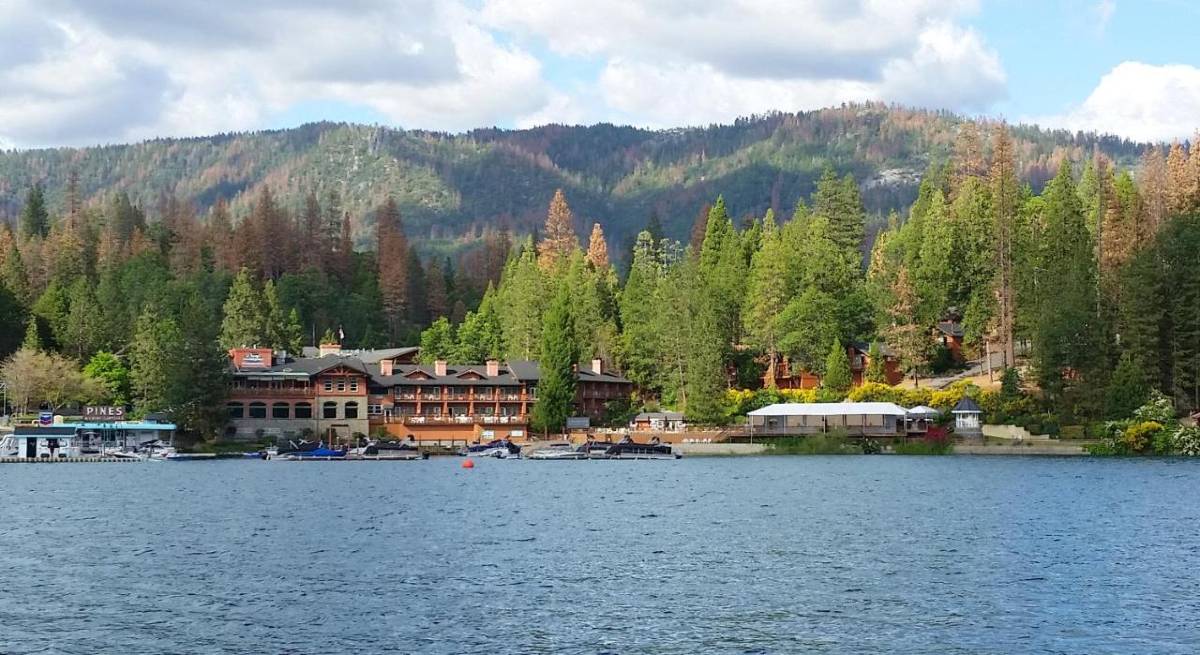
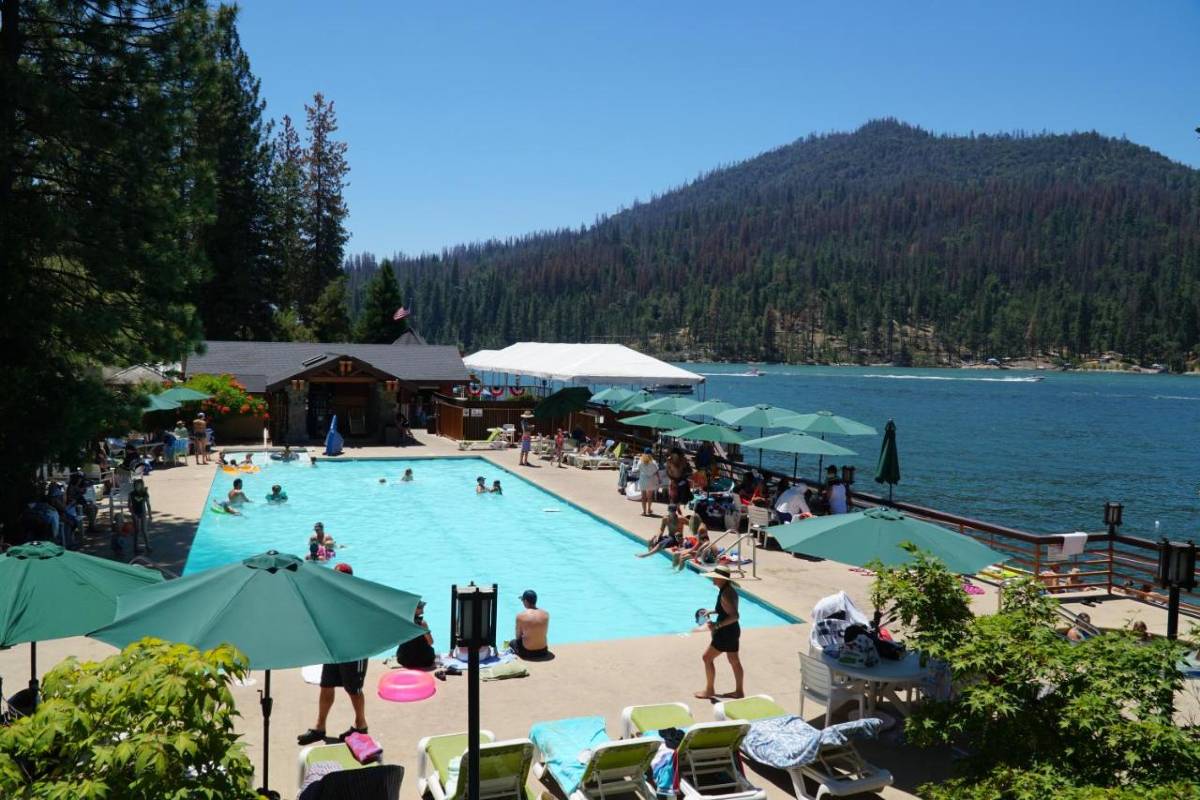
- The Pines Resort: Well-equipped lakefront chalets and cabins
- Luxury Waterfront Cabin with Private Dock: Whitney Cove luxury cabin sleeps 10
- Cozy Modern Cabin: Bright, modern cabin with hot tub in central Bass Lake

